
Hello and welcome to the Build Log for my BioShock Little Sister cosplay! This was my first attempt at cosplay, although I have made other costumes previously. Forgive me if the instructions are a little disorganized; it’s only because I’m equally disorganized. 😮
Mr. Gryphon first suggested we do a Big Daddy and Little Sister cosplay after we learned about an upcoming convention in our hometown. We thought it would be a good option for us just based on our size difference. Only later did we realize that each of our costumes would really play to our strengths in costume building!
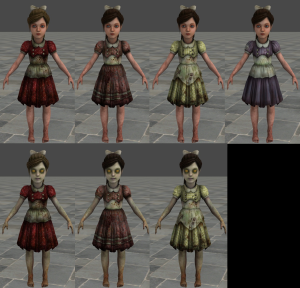
Initially, I was planning on a cosplay of the Little Sisters design from Bioshock 2:
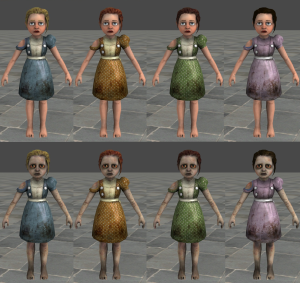
But with Mr. Gryphon planning the iconic Big Daddy Bouncer costume rather than the Alpha Series more associated with Bioshock 2, I decided it would be fitting to stick with the Little Sisters design from the original Bioshock:
Alright, with that unnecessary background out of the way, here’s how I actually made the dress!
For the fabric, I used a lilac cotton flannel. I though flannel seemed like a good fabric choice for a child’s dress, and after washing it, the dress came out really soft and comfortable. Plus, the distressed effect I added (which I will go over in another post) looks so good on the fabric!
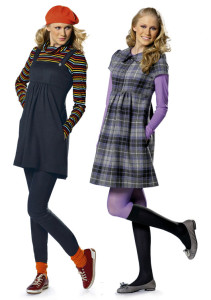
I used Burda pattern 7739 as the base for the dress, since it had most of the features I was looking for: high waist, short skirt, and optional straps. It also had the Peter Pan style collar I was searching for originally, but since I decided on a different design that didn’t really matter.
But the best part of the design? It has pockets!
I did make a few adjustments to the pattern in order to get the Little Sister style I was going for.
First, I made the skirt flare out just a bit more. I had originally planned to wear a petticoat underneath, but this turned out to be too much! Adding a little extra width to the bottom of the skirt makes it flare out without overdoing it.
Second, I removed the collar. I kept the collar facing and just attached it to the neck of the dress, but later trimmed the facing so it wasn’t too awkward when wearing the dress. There was probably a better way to do that, but I’m still learning… 😛
Third, I made the sleeves a little puffier. The original pattern has a bit of a puff to the sleeve, but I wanted something bigger to fit the design of the Little Sisters’ dresses and to make the dress look a little more childlike. After a lot of research and some playing around with the existing pattern sleeves, I eventually made my own pattern that came out like this:
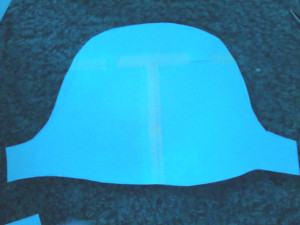
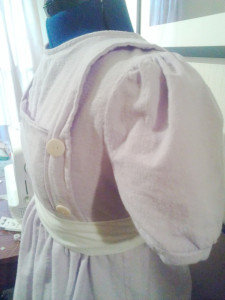
The sleeves could use even more puff to them, but I’m happy with what turned out for my first time making puffy sleeves. 🙂 Oh, and I also added a simple cuff to the collar.
And finally, I added the apron effect to the bodice of the dress. This turned out to be easier than I had expected. I took the original strap pattern and extended them to the waist of the dress (which took some measuring and draping over my shoulder to work out the best length). For the apron bodice, I measured across my chest for the width and up from my waist to about where I wanted the top of the apron for the height.
I got a little confused when it came to attaching the apron pieces, but I eventually figured it out. 😛 The bodice of the apron is sewn directly onto the bodice of the dress along the sides and sewn into the seam of the bodice and skirt. The straps are attached only at the seam between the dress bodice and skirt.
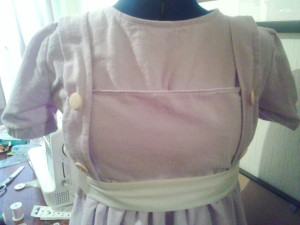
This allows the straps to move more freely, which is nice for the apron effect but bad because it causes the stitches for the apron bodice to be seen when the strap moves. However, this is easily fixed by buttons! I sewed the buttons to both the straps and the dress. This keeps the straps in place over the apron bodice but still allows them some free movement.
If I had been thinking more, I would have attached the apron bodice to the straps themselves. Oh well!
Here are some finished images of the dress below (to make up for me not taking enough pictures of the actual steps, maybe?). I forgot to wash the fabric beforehand, so you can see what a difference washing makes on the fabric.
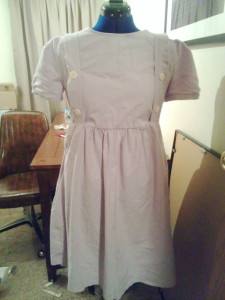
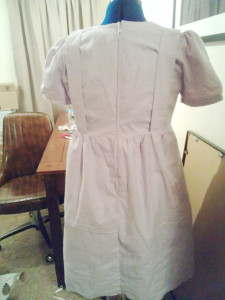
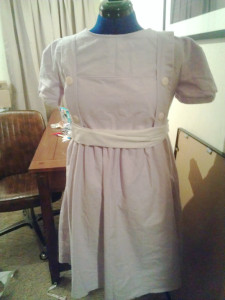
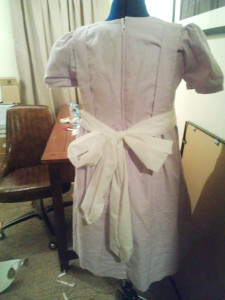
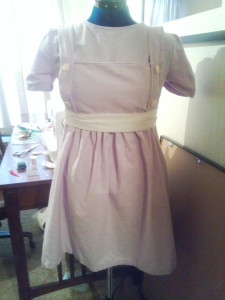
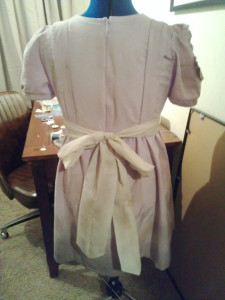
What a difference a wash makes!
Overall, the dress was really easy to make, especially for someone who’s still learning to sew. I was really happy with how the dress turned out, so I felt even worse knowing I had to distress it by adding some rips and tears along with some blood and dirt.
Check back soon for another post on how I ruined this perfectly good dress using make-up, paint, and scissors.
To learn how I made the belt/sash, check out Part 2.
Tbh this is the most wonderful bioshock 1 little sister cosplay I have ever seen, it’s so perfect *_*