
Welcome! This article is part three of a series for my BioShock Little Sister Cosplay. If you’d like to learn how I made the dress and belt, check out Part 1 and Part 2 respectively.
I’ll admit, quite a bit of time elapsed between making the dress and adding the wear and tear effect to it. Mainly because I wanted to wait and make a few adjustments to the dress once it was closer to the event so I could make sure it fit correctly. But once the adjustments were made, I was more than a little hesitant about destroying such a nice dress.
I busied myself with other projects, but, eventually, I could no longer avoid the inevitable. Wanting to start with something simple, I decided to remove one of the buttons.
Bracing myself, I gripped the lower left button, grabbed a seam ripper, and began. Using the seam ripper to break the threads as needed, I tore off the button, leaving a few ragged threads behind. It was a simple action, taking no more than a few seconds, but with that step, the process had begun.
There would be no going back.
I was hooked.
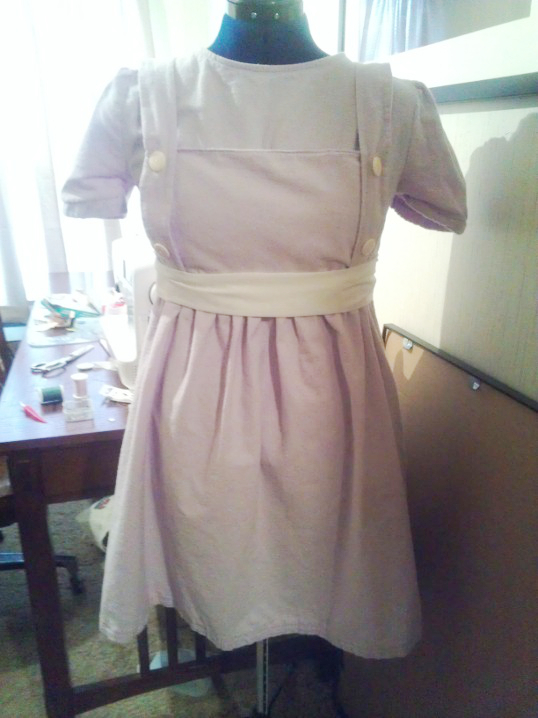
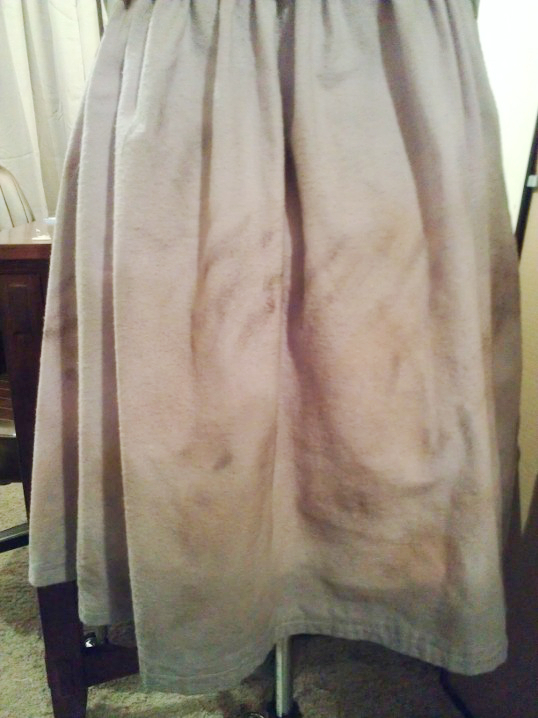
With some blood, sweat, and tears (or rather paint, makeup, and scissors), this:
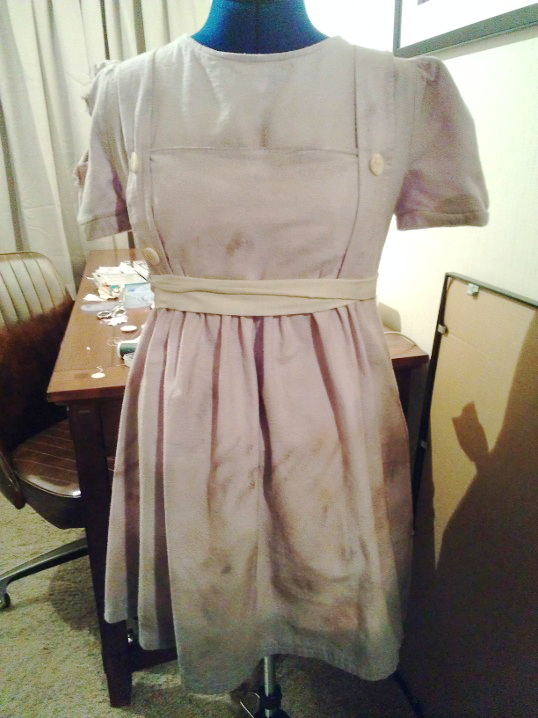
Became this:
Drama aside, adding a distressed and worn look to the dress turned out to be a lot of fun. I had already spent some time distressing the Little Sister syringe (guide coming soon!) with some watered down paint, and after some research, I learned that makeup can be used to add a dirty effect to fabric. So I decided to combine the two and see what happened!
Wear and Tear
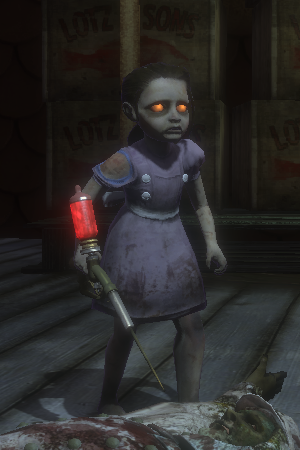 Before I added the dirt effect, I added some rips and tears to the dress. Based on my reference images, the dress should have a missing button and a torn sleeve (it also looks like the dress should have a blue lining, but I didn’t add a lining to my dress, so oh well!). As mentioned before, the button was easy enough to remove with a seam ripper. I made sure to leave some threads behind as evidence of the button’s existence.
For the torn sleeve, I used scissors and a seam ripper. With the scissors, I began each cut in the direction I wanted, then ripped the fabric the rest of the way to make the tear seem more natural. If the tear went too straight, I used the scissors to zigzag the edge a bit. Instead of cutting an entire hole in the sleeve, I cut about 3/4 of a hole and left the torn part of the sleeve attached for a more realistic appearance.
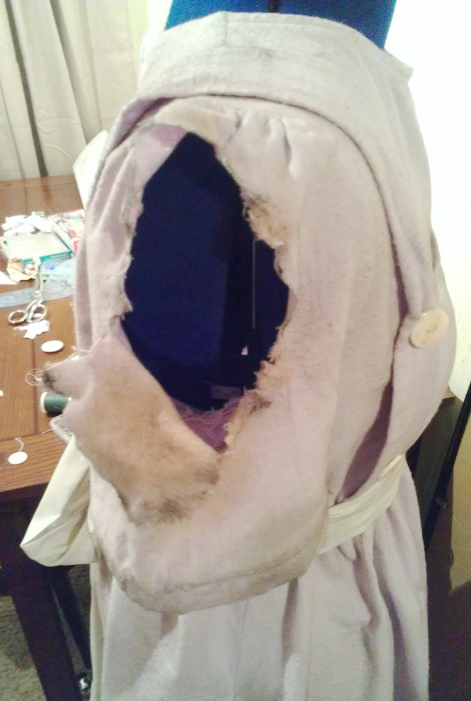
After I had the hole the right size and shape, I used the seam ripper to pull apart the fabric weave along the edge of the hole to get a more ragged look.
Gettin’ Dirty
To test out the dirt effect, I grabbed some of my brown eye shadow and a powder brush and started brushing away! It didn’t take long for me to realize this would take a lot of makeup, and I really didn’t want to use up all of my good brown eye shadow.
The closest drug store was having a buy one get one 50% off sale, so I purchased two Maybelline eye shadow sets: The Nudes Palette and Color Molten by Eye Studio (Endless Mocha). I wasn’t really sure which option would be best, but both turned out to work really well together. The Nudes Palette had a variety of colors that I could blend together for adding a subtle dirt effect over most of the dress, while the Color Molten palette worked really well for adding darker details.
As I was adding the makeup, I couldn’t really see much of a difference until I compared it to a section I hadn’t dirtied yet (such as the area underneath the straps, which I almost forgot :P). Then the difference was really noticeable! With the makeup, the fabric really looks worn and dirtied without being over-the-top.
However, it still wasn’t quite enough for me, especially when it came to the bottom of the skirt. Since the Little Sisters spend a lot of time crawling around their transport tunnels and crouching to extract some ADAM from “angels,” it makes sense for the bottom of their skirts to be especially dirty.
In a spray bottle from the dollar store, I mixed together some black paint, brown paint, and water (about 30% paint, 70% water) and squirted the mixture on the dress, concentrating on the bottom hem. Make sure to do this step outside! The spray bottle was cheap and kept getting clogged up by paint, so the paint mixture went all over the place. This was good for a getting a really uneven splatter effect but bad for the surrounding area.
I squirted the brown and black paint mixture over various areas of the dress, but I tried to make it darkest at the hem of the dress and on the torn sleeve. After that step was done, I rinsed out the spray bottle and made a new mixture of red paint, orange paint, brown paint, and water (still about 30% paint, 70% water). I squirted this paint mixture more sparingly then the previous and from a little farther away to give the appearance of blood spatter. I also added more of the mixture around the torn sleeve, since anything that tears the sleeve that much probably broke some skin too.
The paint and makeup effects looked really good, but there was still something missing. At this point I was having so much fun that I grabbed my Color Molten palette, rubbed my fingers in the darkest brown color of eye shadow, and started smearing streaks onto the dress. Since the Little Sisters are really just little girls, it makes sense for them to wipe dirty hands on their dresses. The streaks turned out really nice and made the dress look a little more like the reference image. I also used my fingers to add the dark brown eye shadow a little heavier around the edges of the torn sleeve.
Once the paint dried, it was a little lighter than it appeared originally, but it still has a nice grimy look to it. Overall, I’m really happy with how the distressed appearance turned out. And I don’t feel nearly as bad as a I should for ruining the dress.
The dress may be done, but this guide is not. Part 4 is coming soon!